Get started
About the Zodiac Reality Module
This module (also known as SafeSnap) allows on-chain execution based on the outcome of events reported by the Reality.eth oracle. While built initially to execute Safe transactions according to Snapshot proposals, this module is framework agnostic. It can enable proposal execution from just about anywhere.
This tutorial is for DAO Operators using the Zodiac App interface. For a more technical guide on how to use the Reality Module beyond the Zodiac App interface, see the Github repo Setup Guide.
If you need support or have questions about this tutorial or Zodiac, join the Gnosis Guild Discord.
Set Up a Safe (formerly Gnosis Safe)
If you've already set up a Safe you'd like to use for this tutorial, skip to the next step below.
If you have not set up a Safe, check out the Safe Help Center. The Create a Safe tutorial will walk you through the full process of creating a new Safe account in just 60 seconds.
Note that, for the purposes of this tutorial, we'll be using a Safe deployed on the Rinkeby test network. You can create a Safe on Rinkeby.
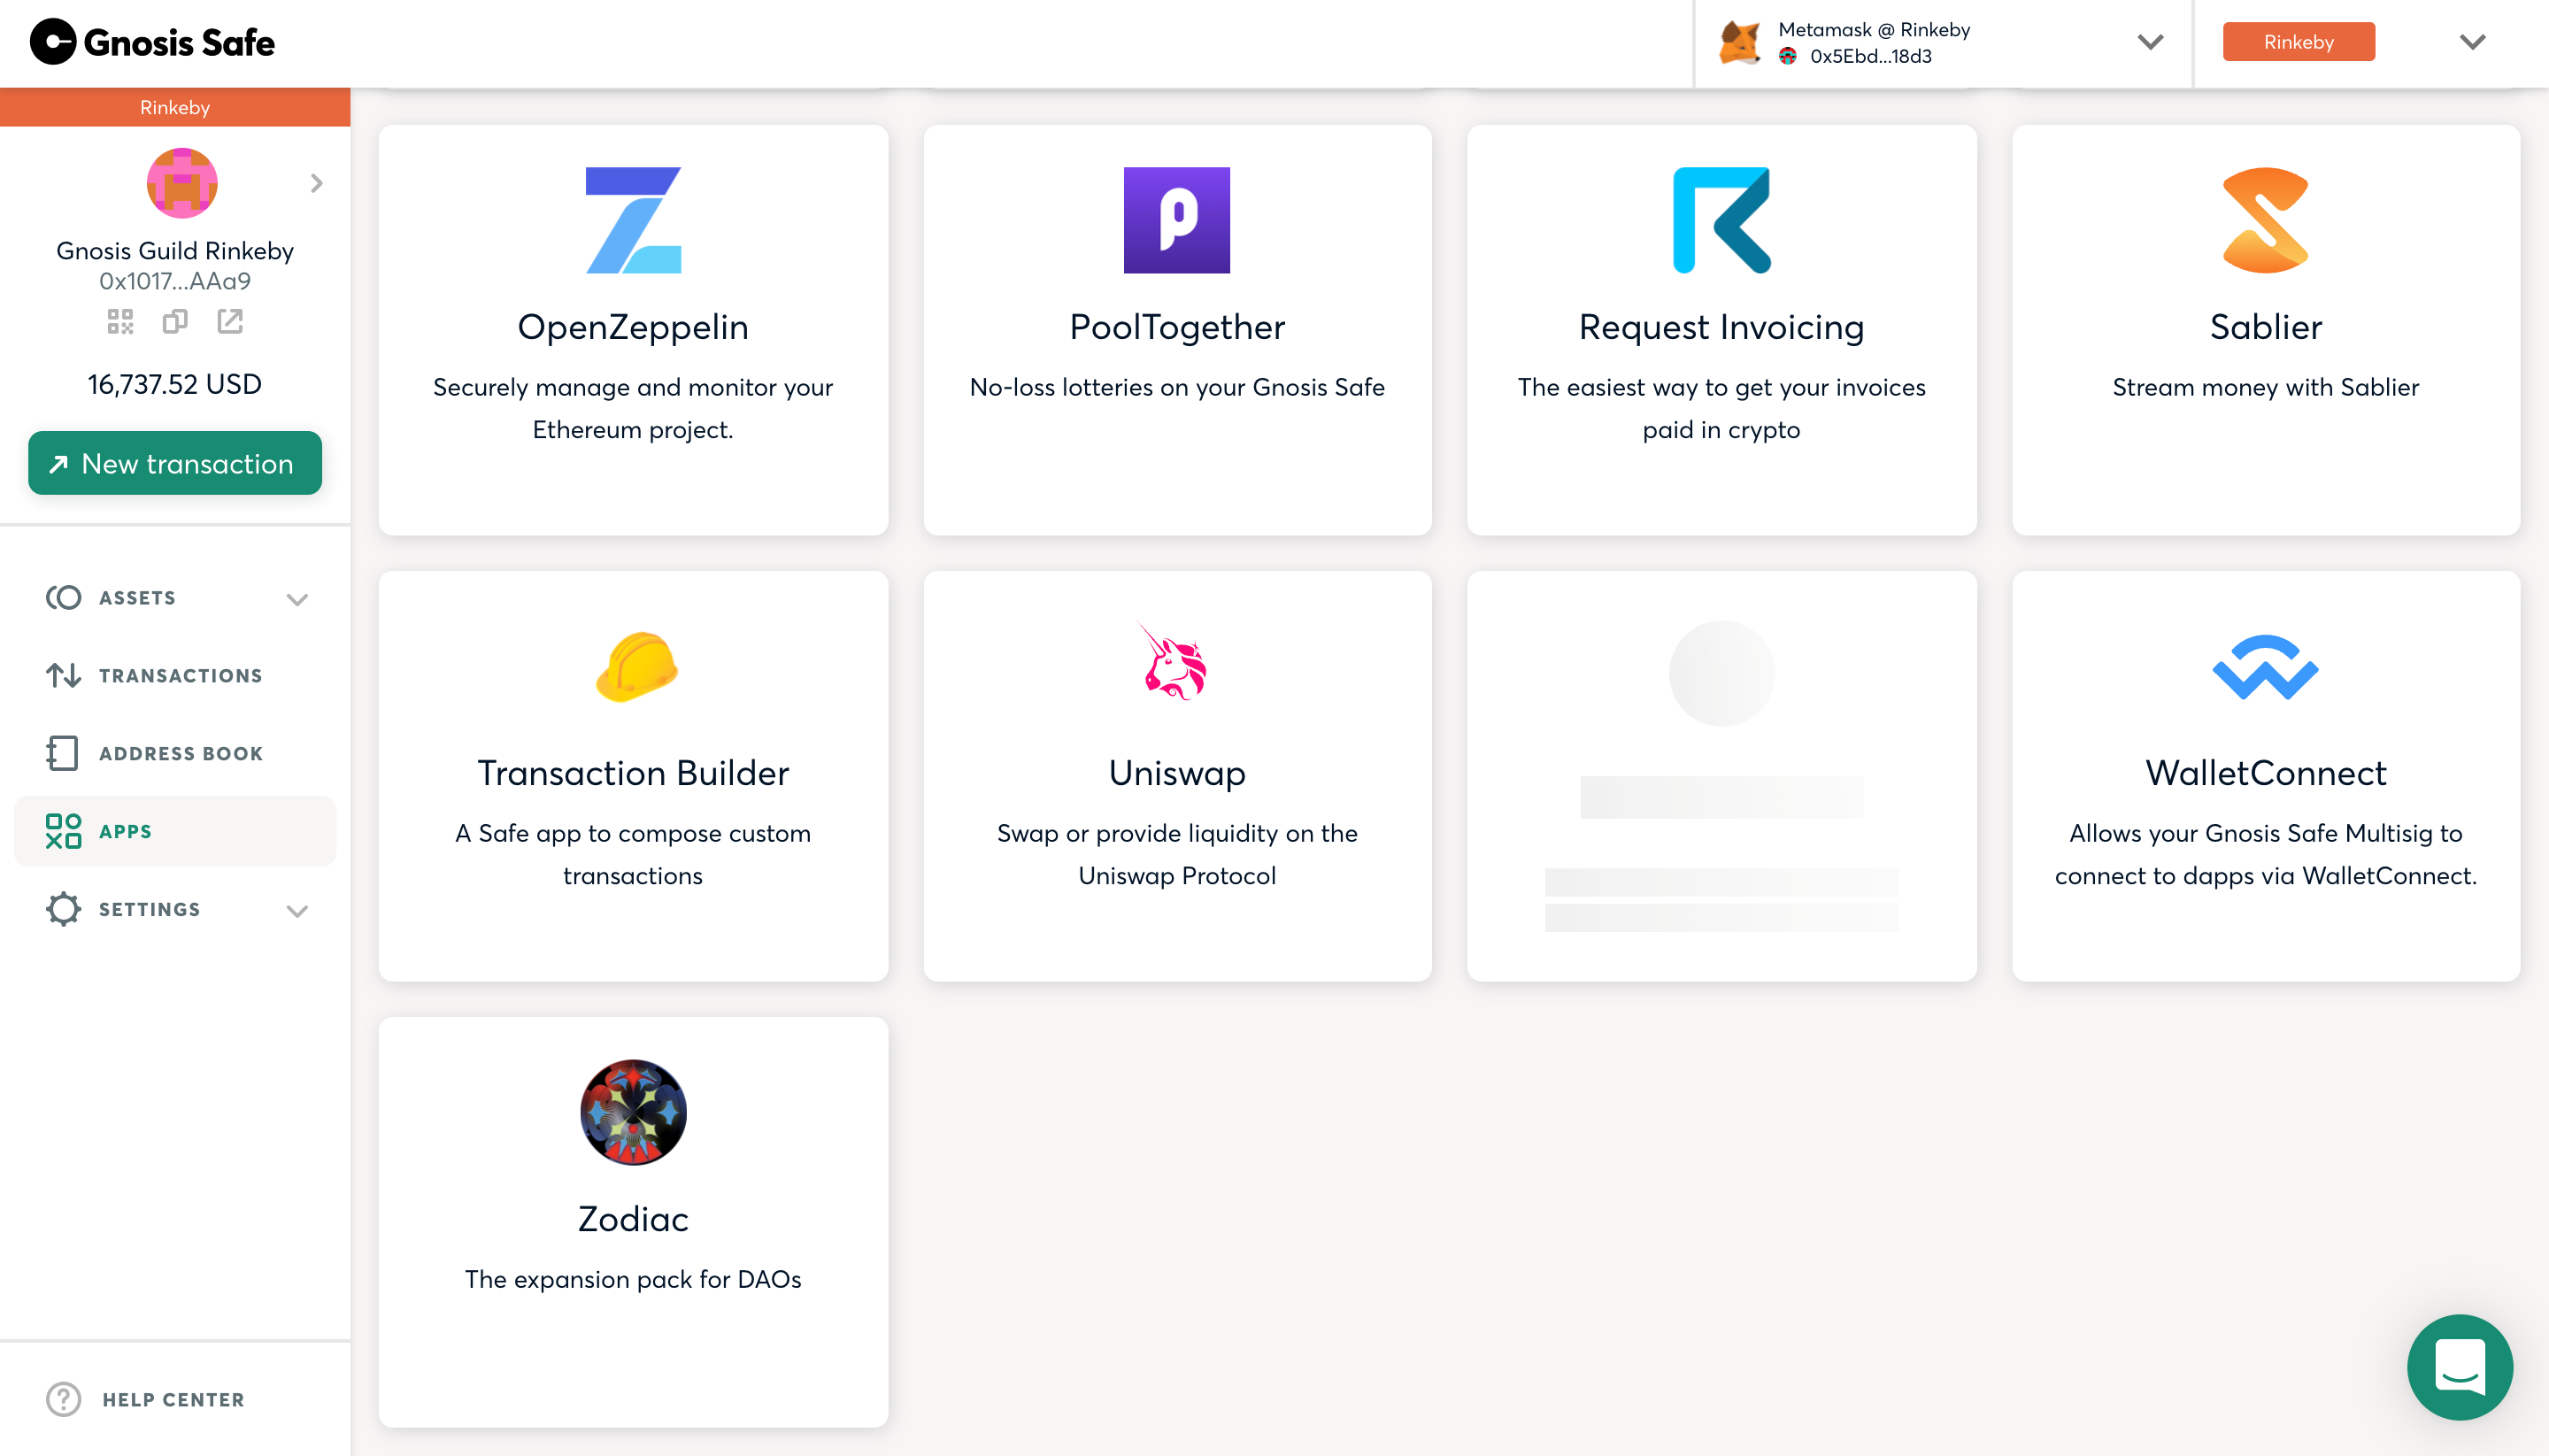
On your Safe's left menu, click the APPS option. Here you'll find apps available through Safe. Search or scroll until you find the Zodiac App.
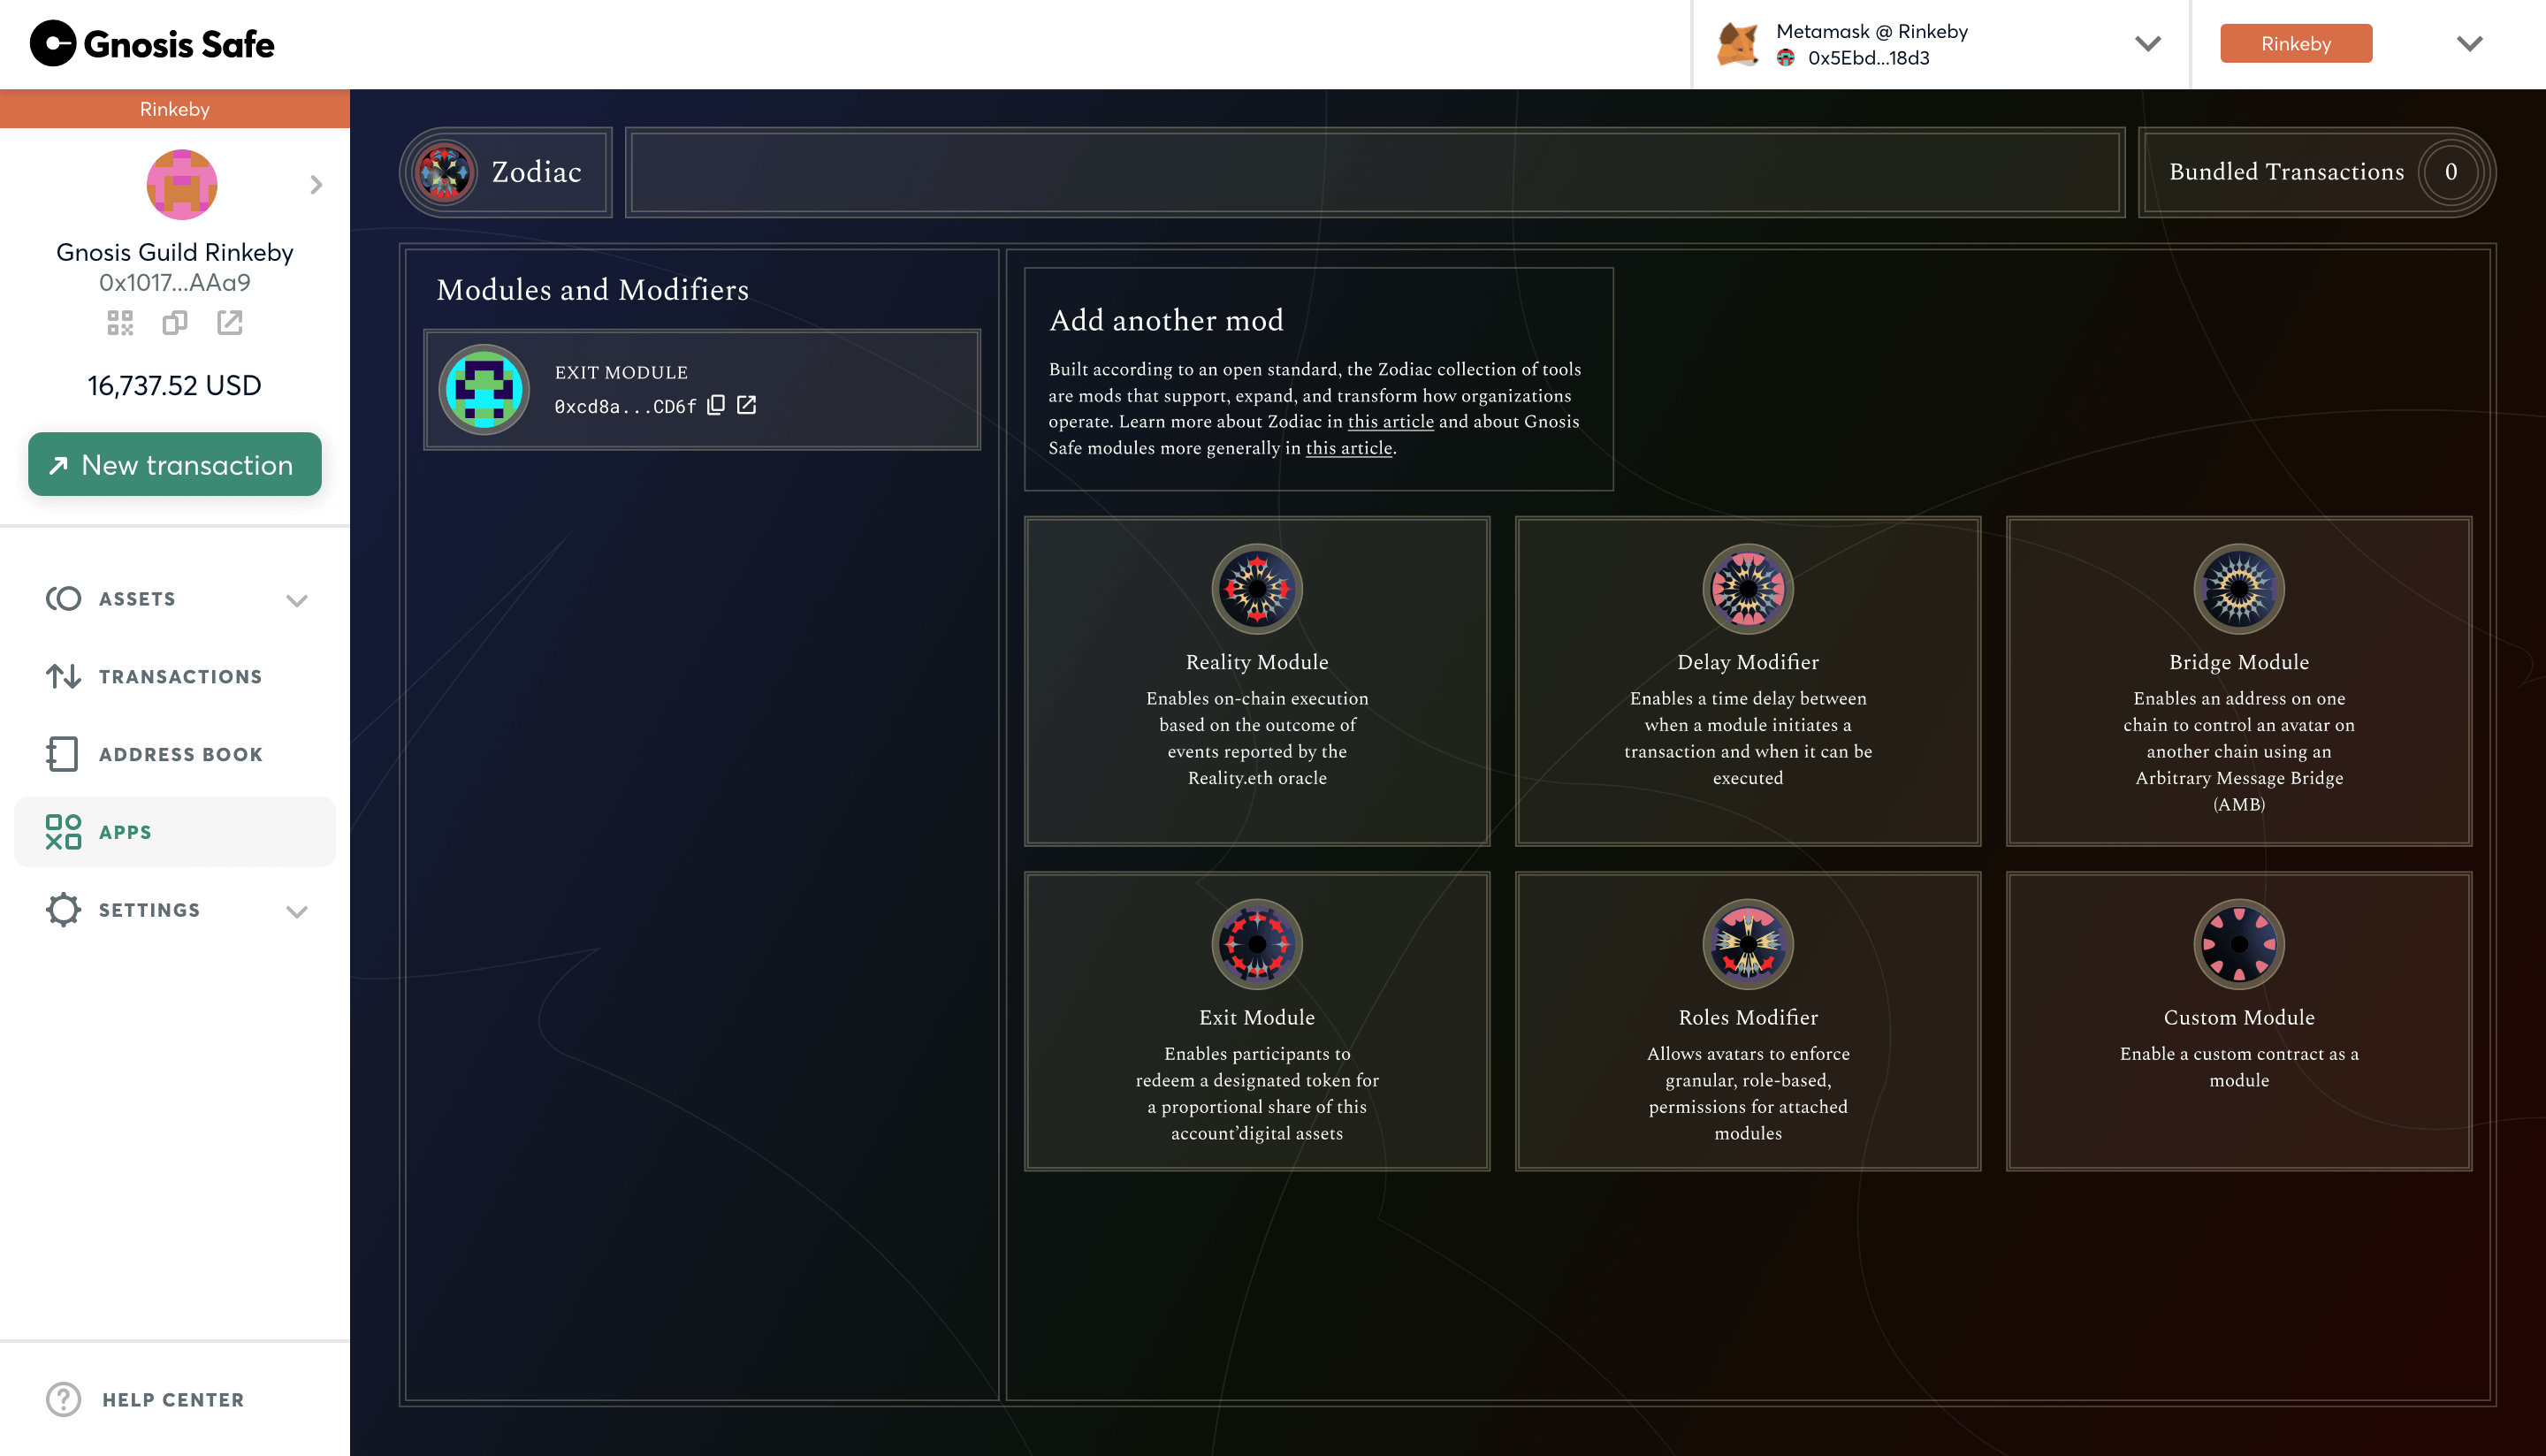
Once entering the Zodiac App, you'll see the current Zodiac-compliant collection of tools that have a Zodiac App interface.
Add template
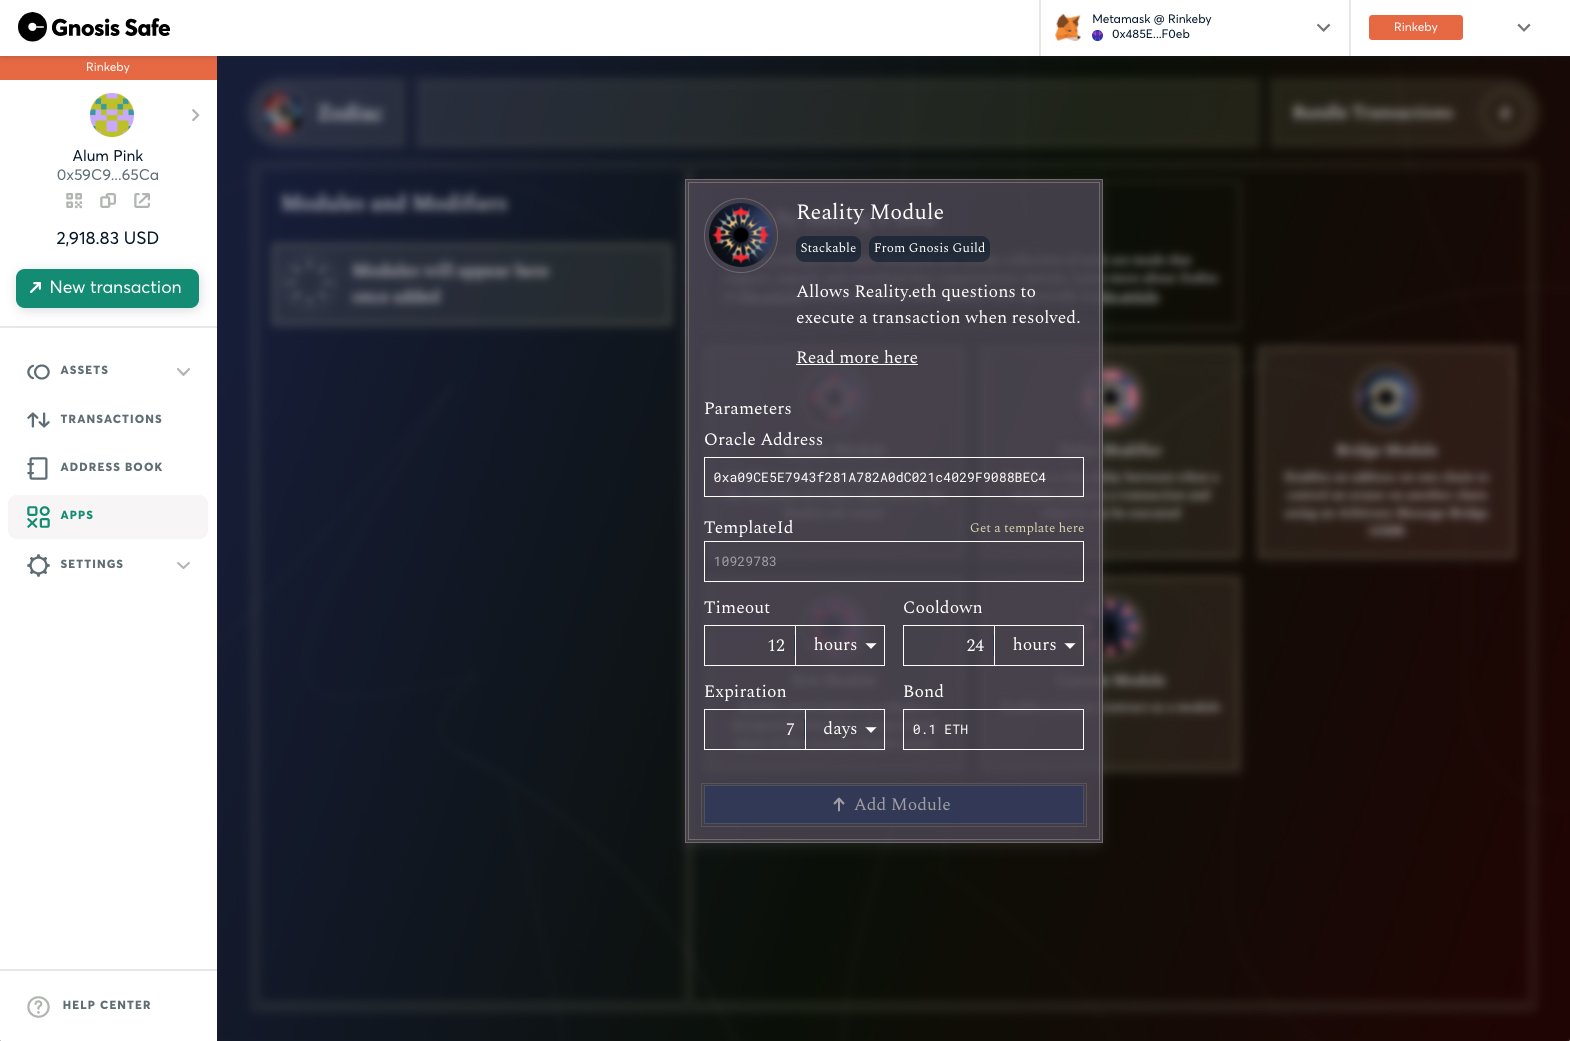
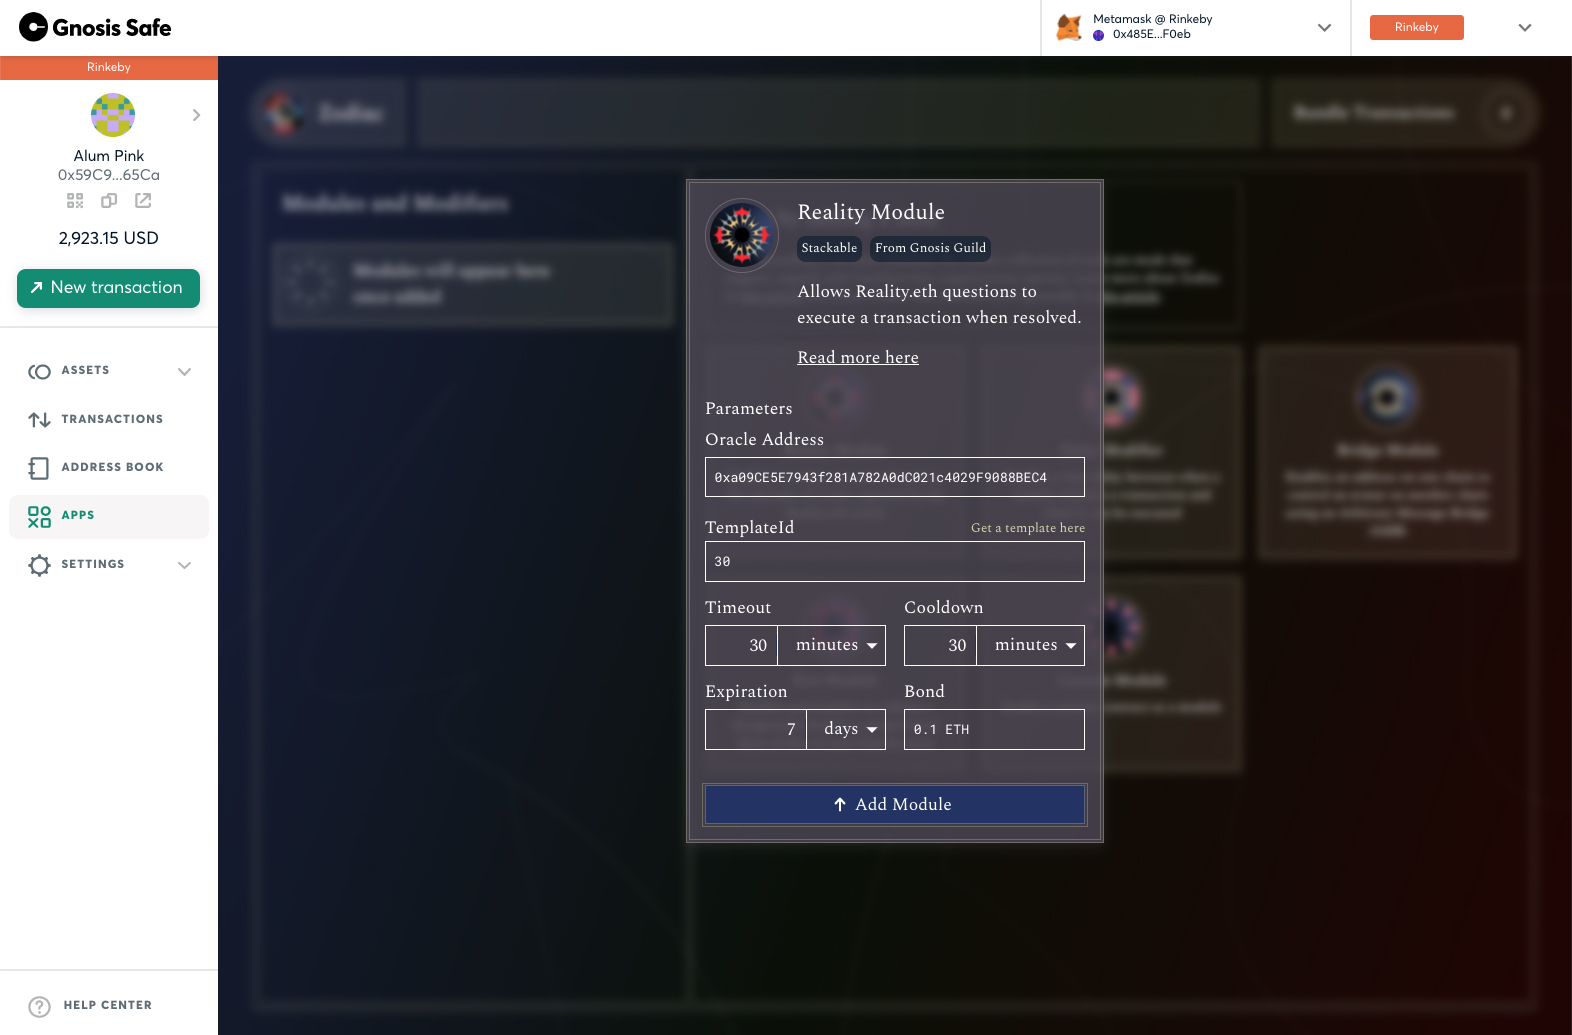
Next click on the Reality Module available through the Zodiac App on Safe. When you open the Reality Module, it will look like this:
Next, fill in the Parameters.
The first parameter, Oracle Address, comes pre-filled. This address points to the currently Reality.eth V3 oracle contracts. Depending on the network you are on, you may need to replace this value with one from the Template Builder.
The second parameter, TemplateId, corresponds to the format in which successful DAO proposals will be verified by the oracle. Let's continue below to give you a better sense of what that means.
Template builder
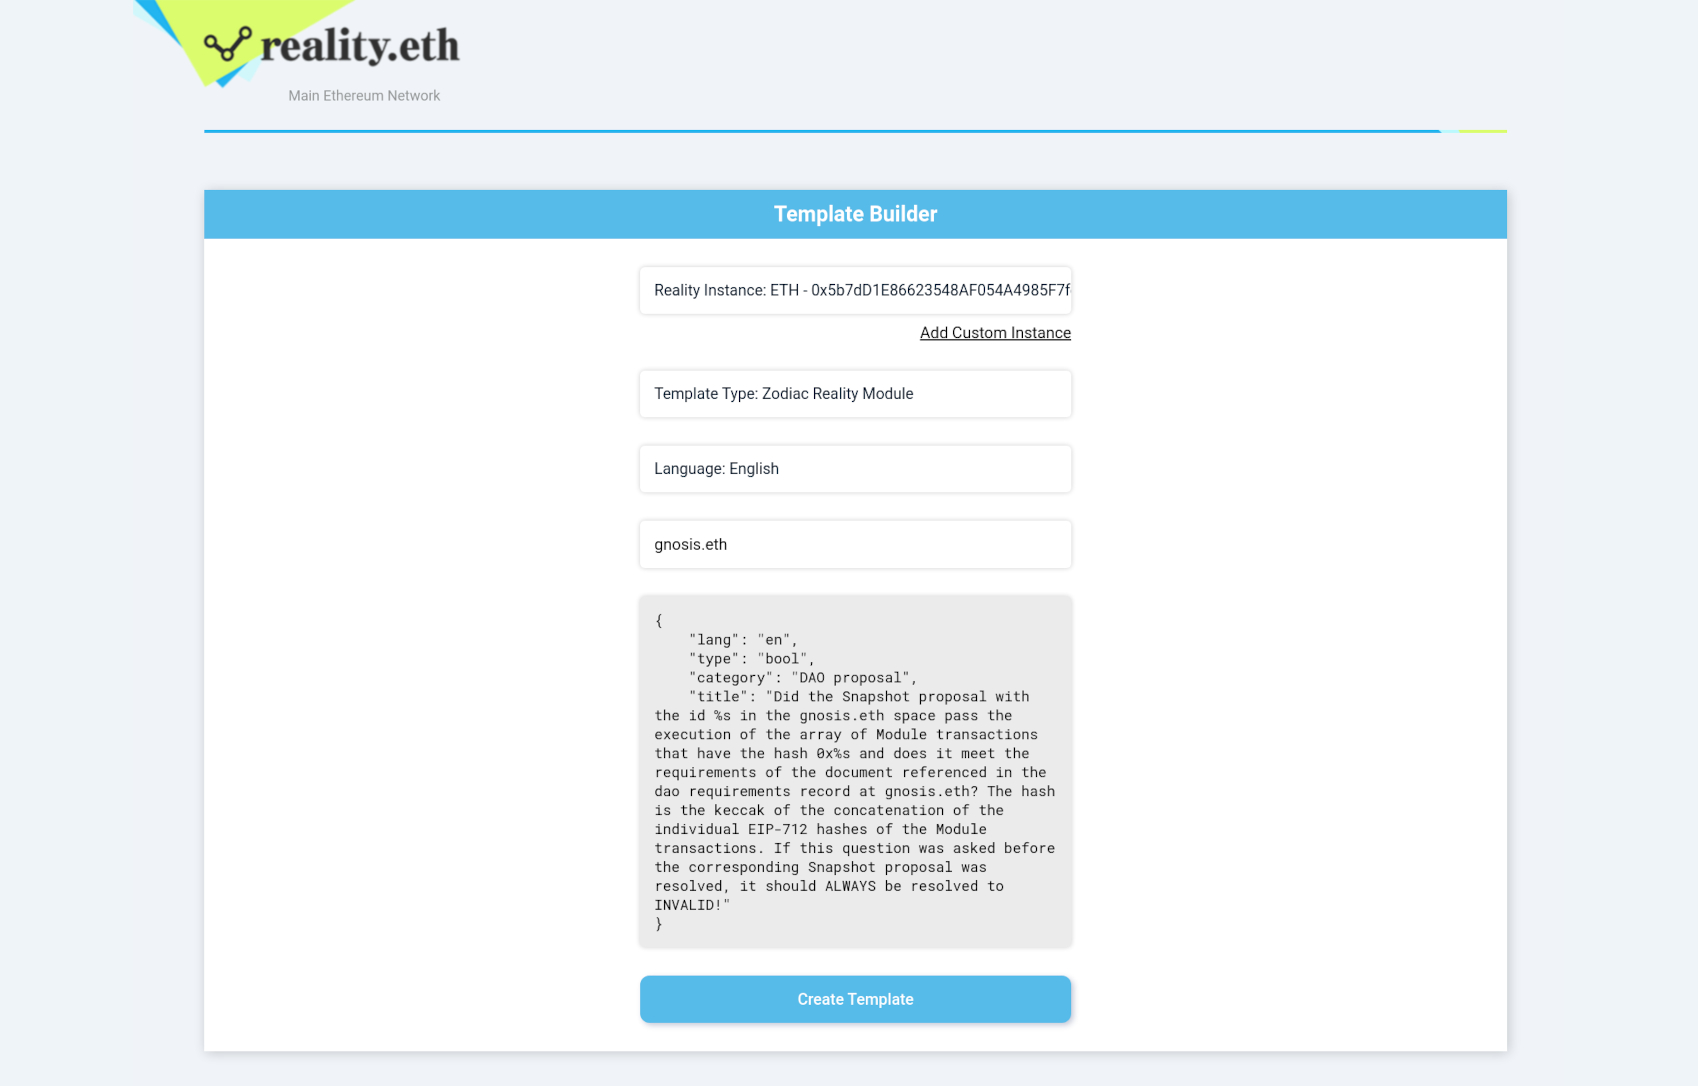
Click on the link at the top-right corner of the TemplateId parameter that says "Get a template here". This will take you to the Reality.eth Template Builder page.
When you arrive at the Template Builder, select the appropriate Reality Instance (Eth for this example), and "Zodiac Reality Module" as the template type. The Zodiac Reality Module type has defaults set for connecting the Reality Module to SafeSnap. If you need a more specific setup, use the "Custom" type.
Language can be freely chosen, as it is only used on the Reality.eth web interface.
Enter in an appropriate ENS name. This will be used in the question template (e.g. "Did the Snapshot proposal with the id %s in the YOUR_ENS_NAME space pass..."). It does not have to be an actual ENS domain name, but often is when used in conjunction with the SafeSnap plugin.
Once the fields are filled in, the generated template JSON will show.
For a deeper dive on creating Reality.eth templates, click here.
Create template
When satisfied with your template, click "Create Template" at the bottom of the page and confirm the transaction with your web3 wallet.
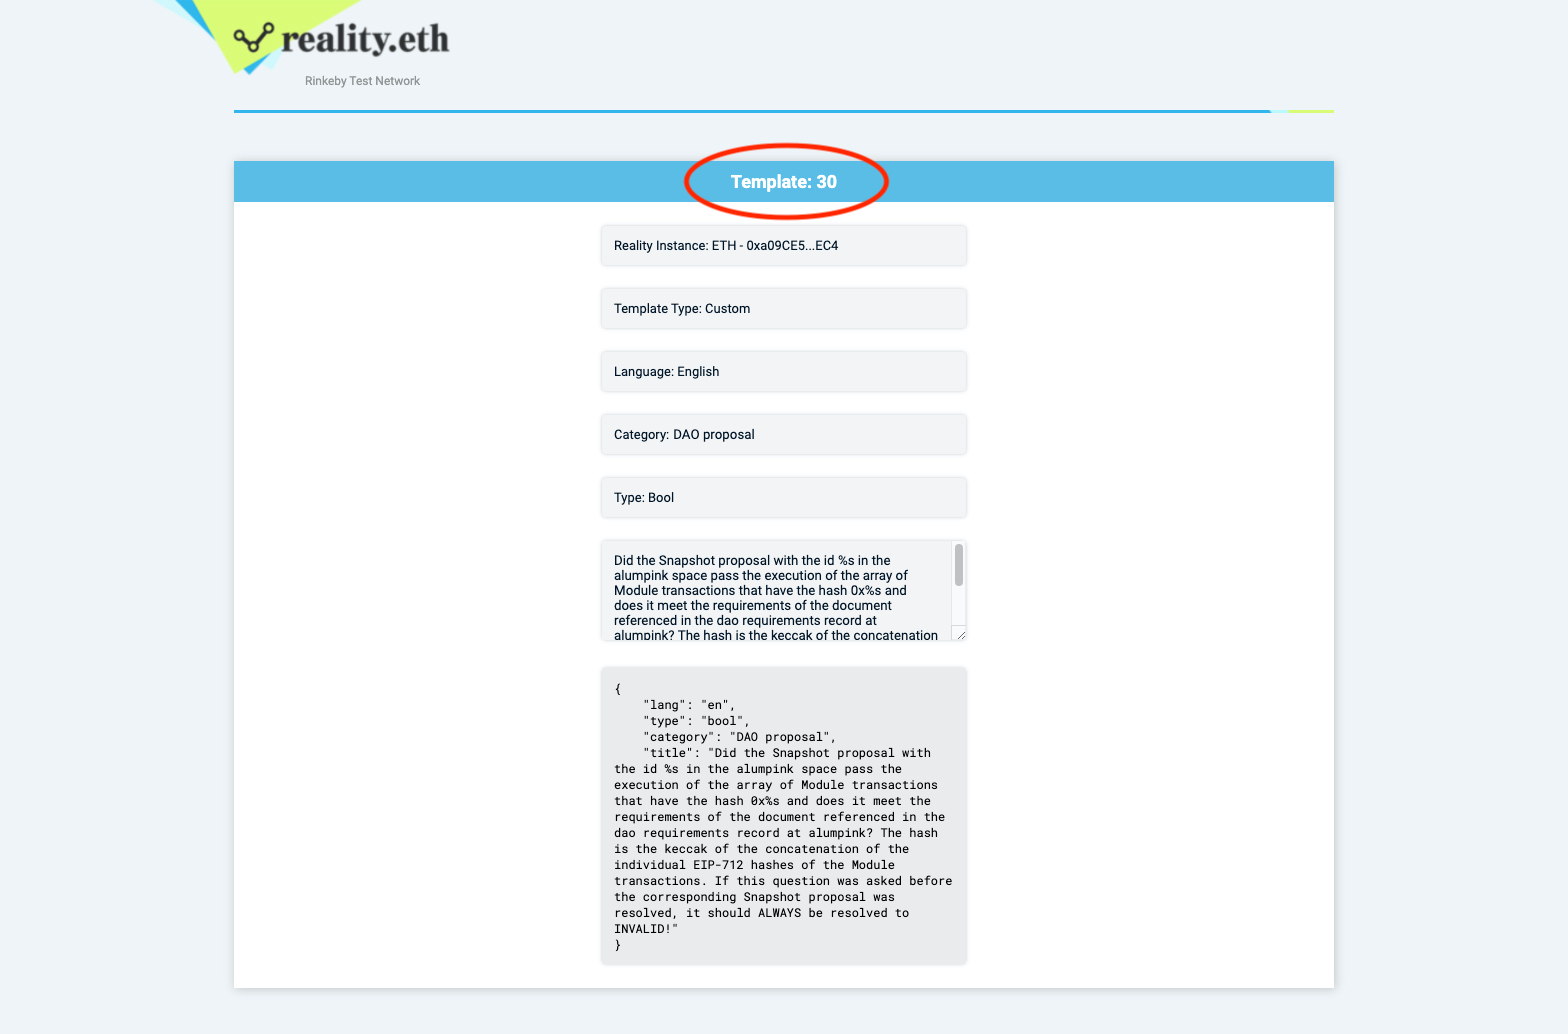
This should return a page like the above. Your TemplateId can be found at the top of the page. In this example, the TemplateId is 30. Also take note of the address in the Reality Instance field. You will need this and the TeamplateId when deploying the Reality module.
Finalize parameters
Now you can return to the Reality Module interface. Enter your TemplateId and ensure the Oracle Address matches the Reality Instance address from the Template Builder. Here we'll enter ours from the example, 31.
You'll want to set each of the remaining Parameters to custom amounts. Some notes on what each field means and its importance:
Timeout: Duration that answers can be submitted to the oracle (resets when a new answer is submitted)Cooldown: Duration required before the transaction can be executed (after the timeout has expired)Expiration: Duration that a transaction is valid in seconds (or 0 if valid forever) after the cooldown (note: this applies to all proposals on this module)Bond: Minimum bond required for an answer to be accepted. New answers must be submitted with double the previous bond. For more on why a bond is required in an escalation game-based oracle, read more in the Reality.eth whitepaper
Here we've entered smaller amounts for the purpose of the tutorial. These Parameters are very important for your DAO's security and should be considered carefully. We'll return to security practices at the end of this tutorial.
Here's an example of how those different fields interact during a question's resolution:
- An answer is submitted to the Oracle, the
Timeouttimer begins. - If no other answer is submitted before the
Timeouttimer reaches 0, the current answer is finalized as correct. - The
Cooldowntimer begins. - When the
Cooldowntimer reaches 0, theExpirationtimer starts. At this point, the transaction can be triggered (through the Reality.eth UI or contract) and will succeed unless theExpirationtimer has reached 0.
Add module
When satisfied with the Parameters you've entered, click the "Add Module" button.
Submit transaction
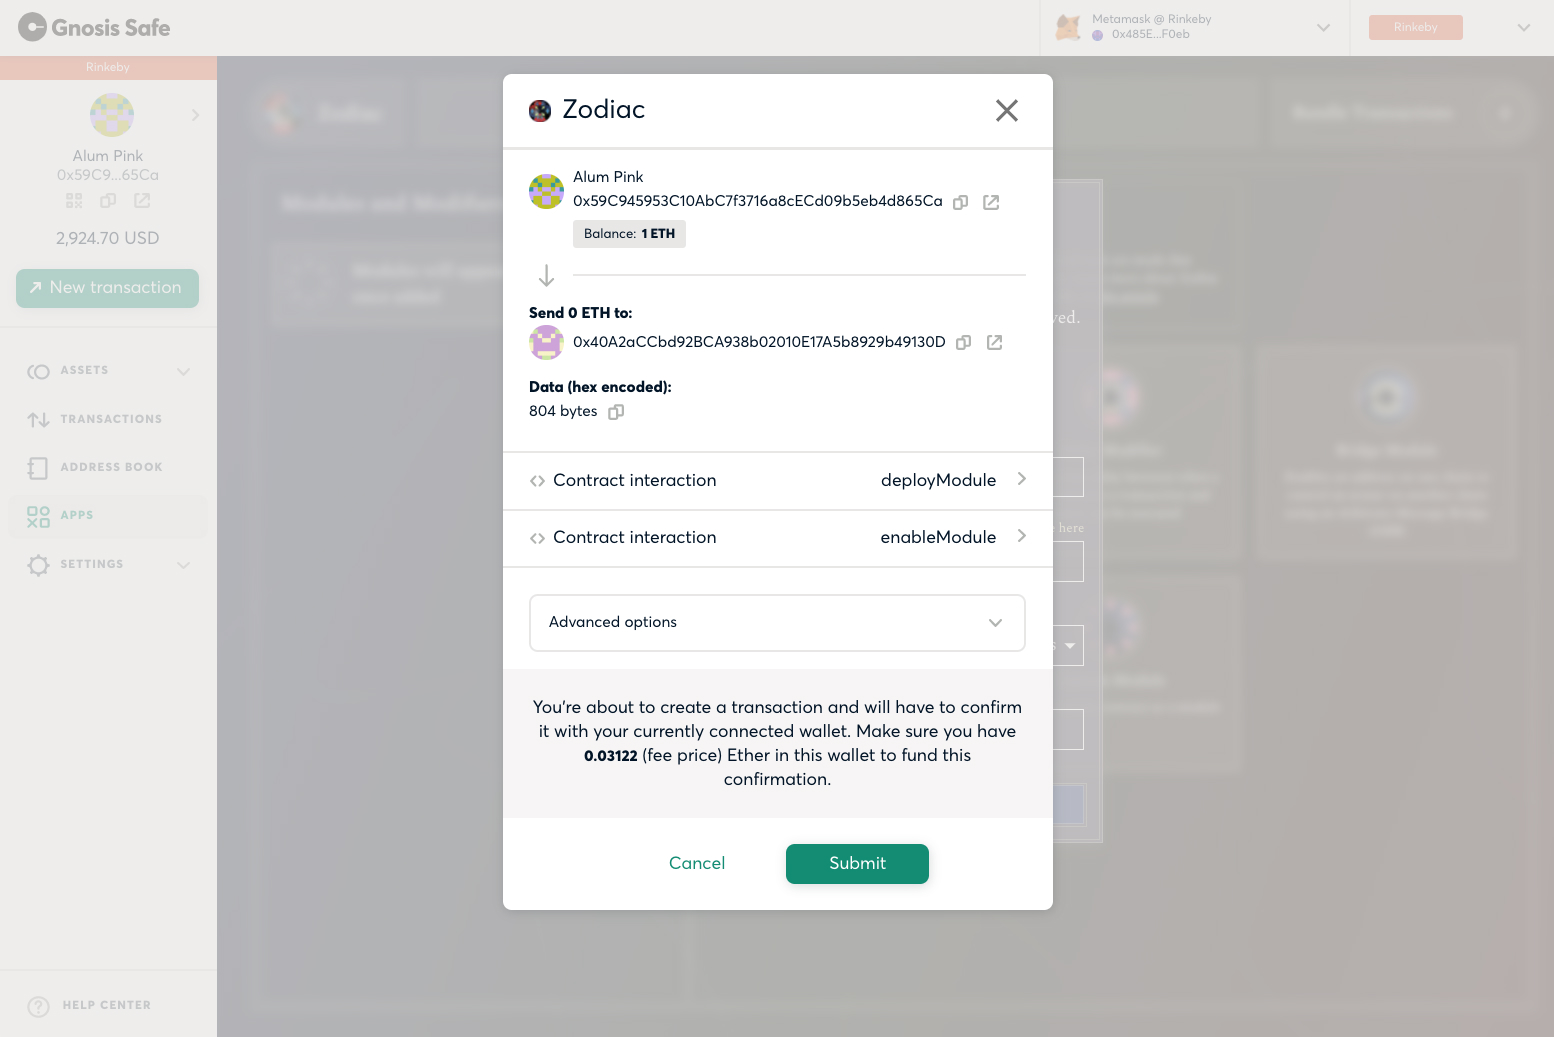
Next, you should see a Safe modal prompting you to review the transaction. Click "Submit" when ready.
Confirm the transaction with your web3 wallet that is a signer on the Safe.
Review module
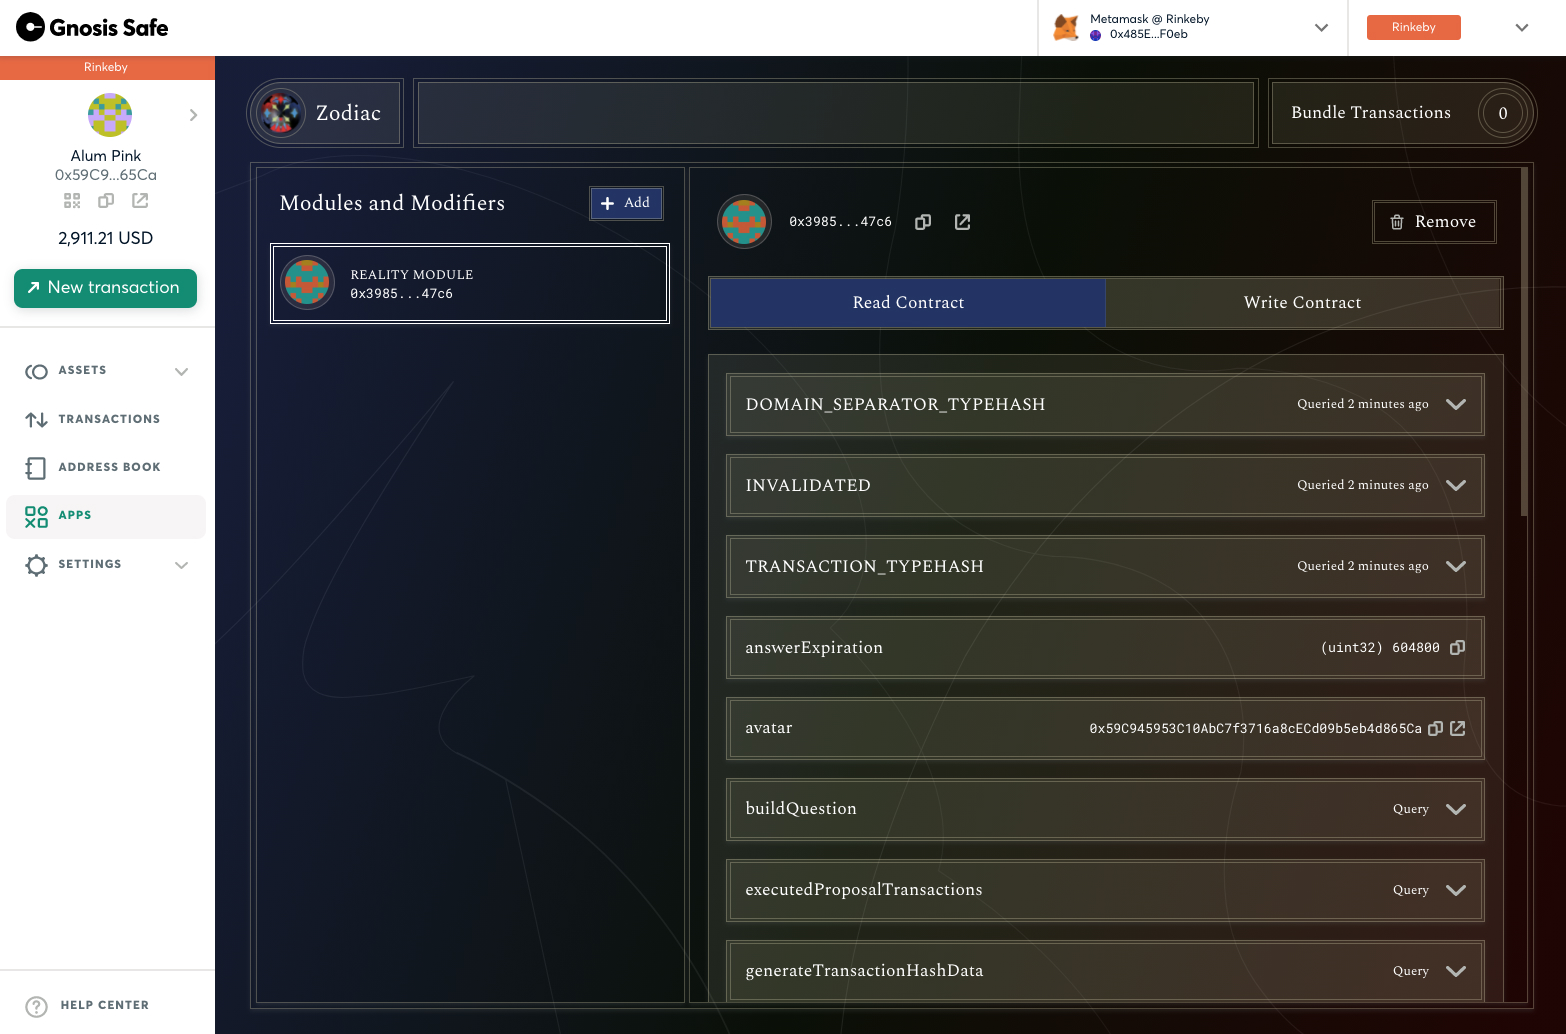
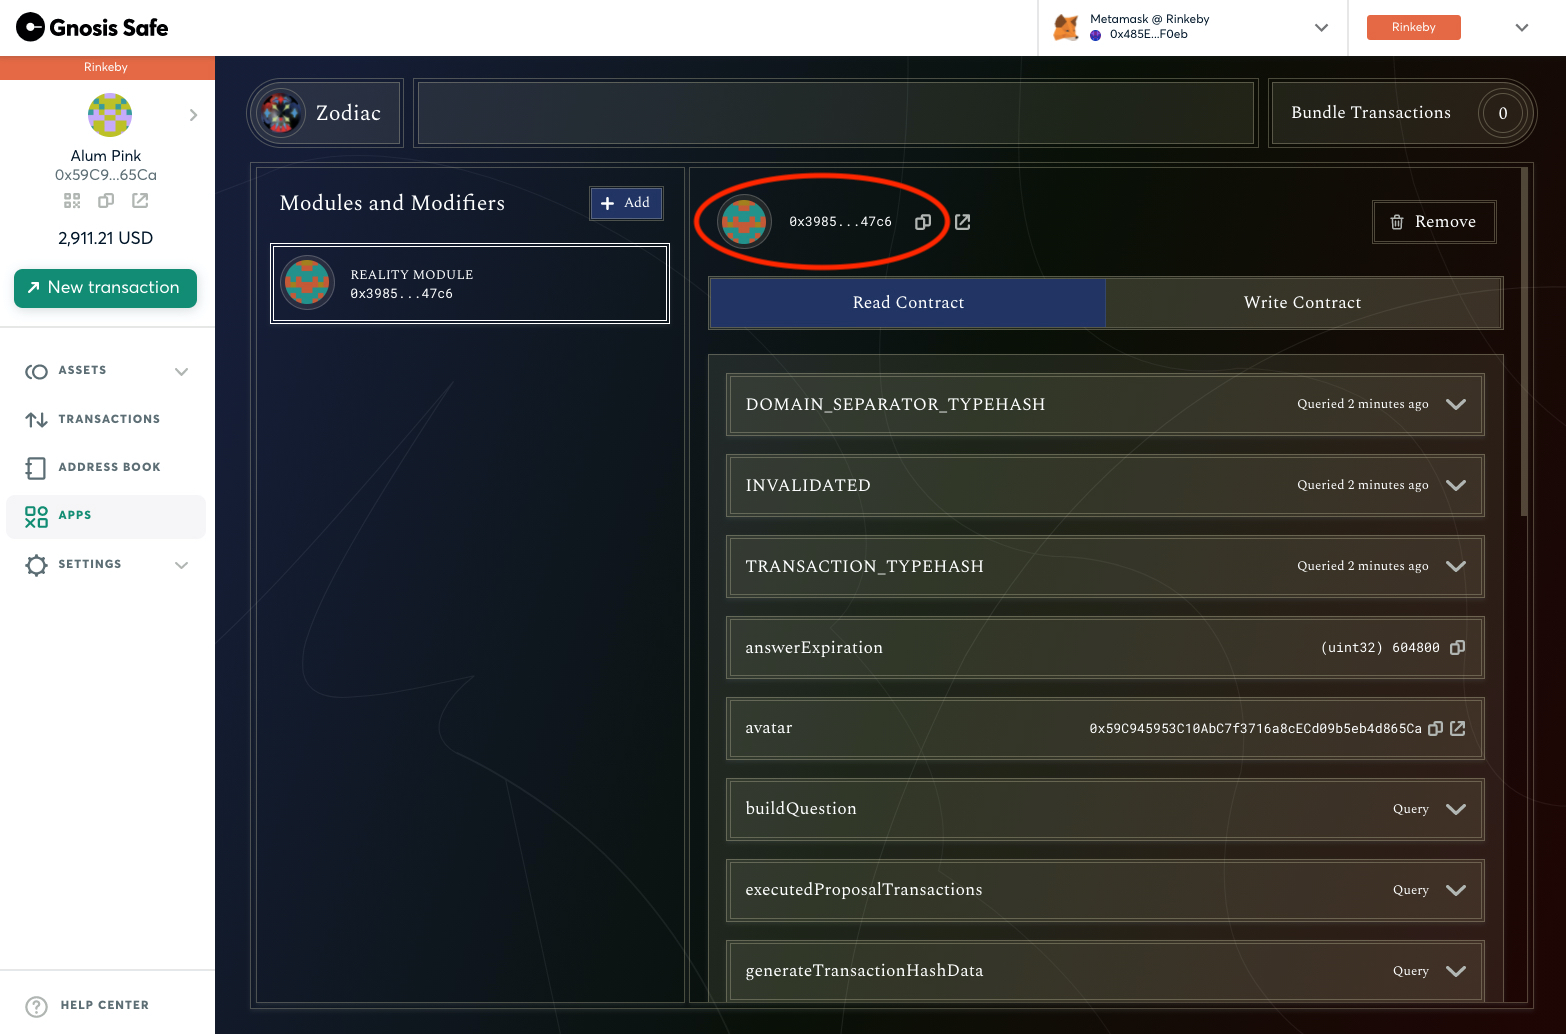
After confirming the transaction, return to a window that displays your configured Exit Module's settings. From here, you can read, write, or remove the module at any time:
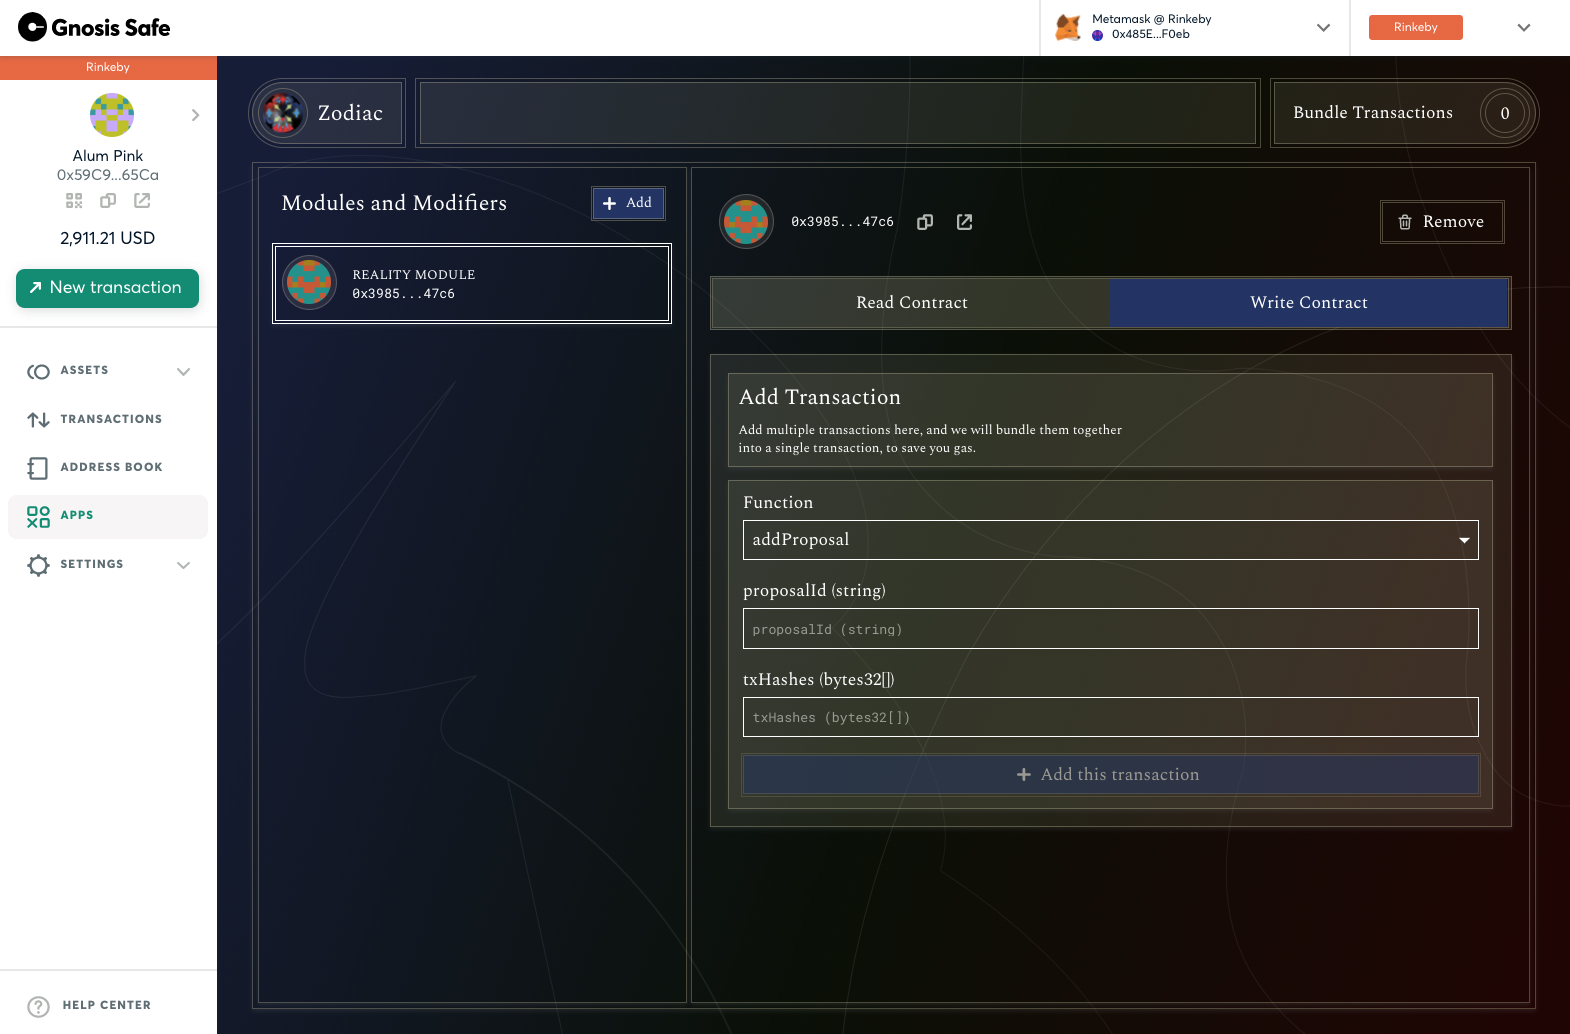
Add or execute proposals
The list of configured Parameters are visible under the "Read Contract" tab. To update these Parameters as well as add and execute proposals, click the "Write Contract" tab.
Here you'll see a dropdown list of functions available to the Reality Module. For more questions about how to add and execute proposals from the Reality Module, join the Gnosis Guild Discord.
Integrate Snapshot
Once the module is set up, it is possible to integrate a space on SnapShot with the Reality Module plugin.
To accomplish this, you can set it up through the SnapShot Space settings or by setting the space's configuration JSON directly. Both methods require the address of the Reality Module, which can be found at the top of its interface on Safe:
To set the JSON directly, the space configuration needs to include "plugins": {"safeSnap": {"safes": [{"network": "CHAIN_ID","realityAddress": "0xSWITCH_WITH_REALITY_MODULE_ADDRESS"}]}}.
More information and an example of this can be found in the SnapShot documentation.
Note that your plugins field should look similar to this:
"plugins": {
"safeSnap": {
"safes": [
{
"network": "CHAIN_ID",
"realityAddress": "0xSWITCH_WITH_REALITY_MODULE_ADDRESS"
}
]
}
},
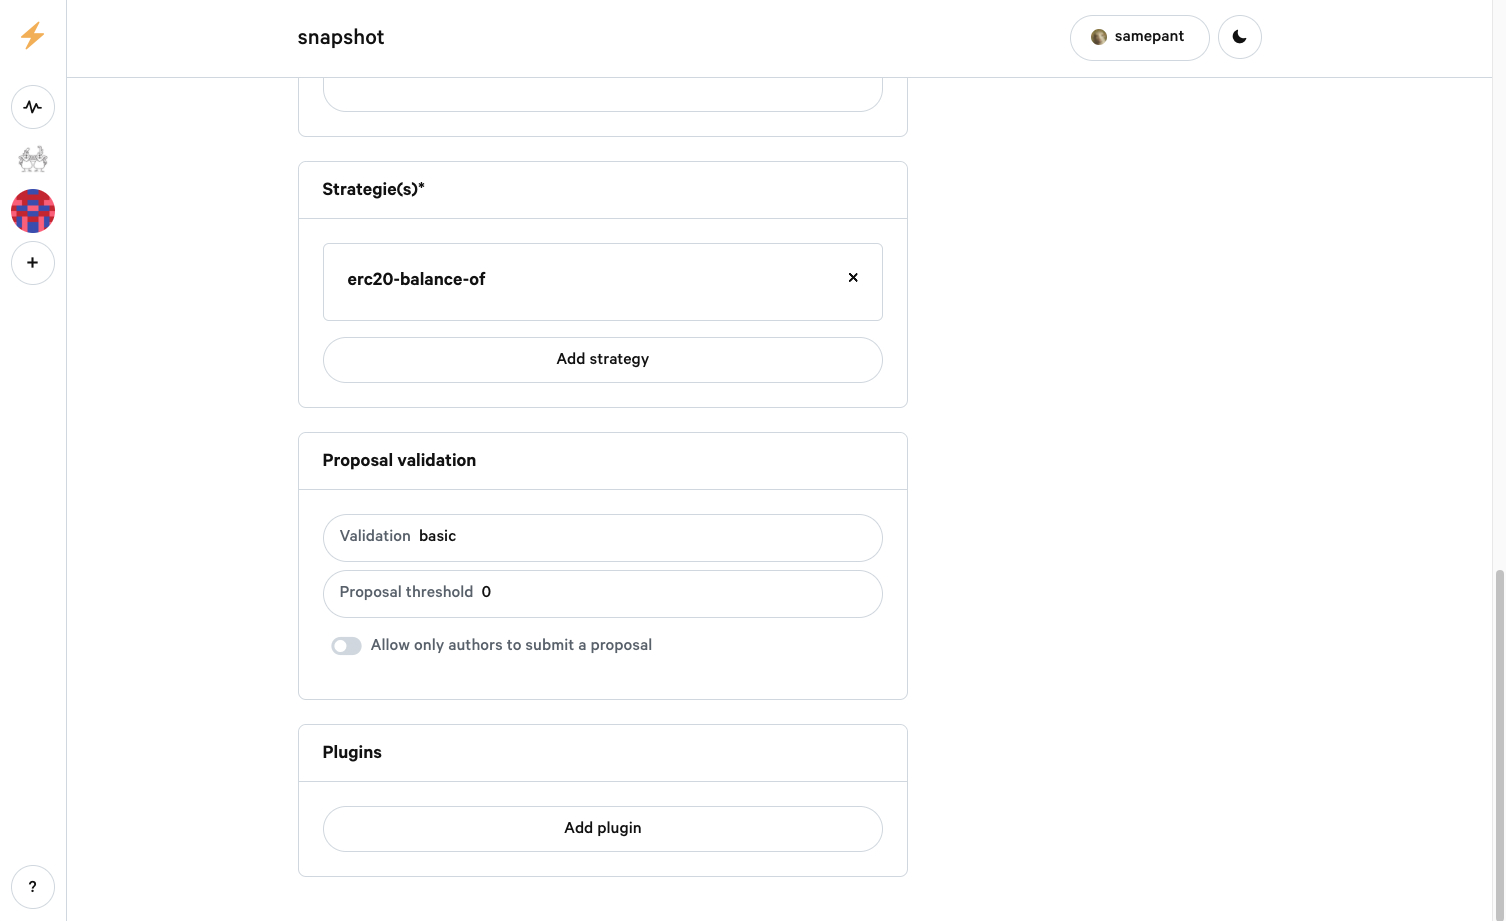
To set up SafeSnap using the UI
1. Open the SnapShot Settings page
The settings to your SnapShot page live at a link similar to https://snapshot.org/#/org_name/settings, where "org_name" should be switched with your group's name.
Scroll down to the bottom of the page, where the plugin settings are.
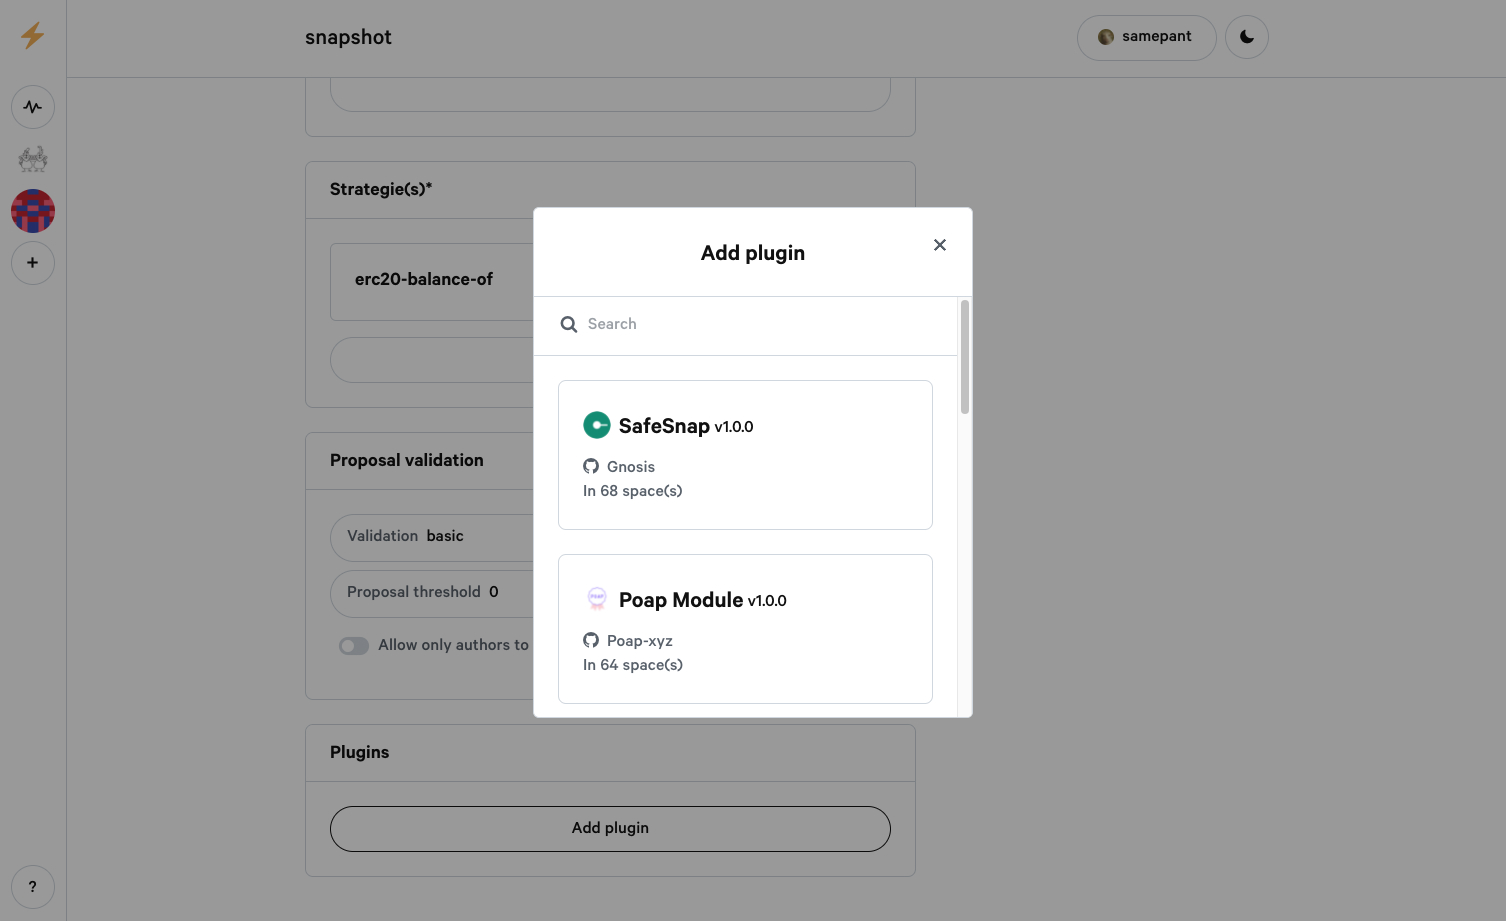
2. Add the SafeSnap plugin
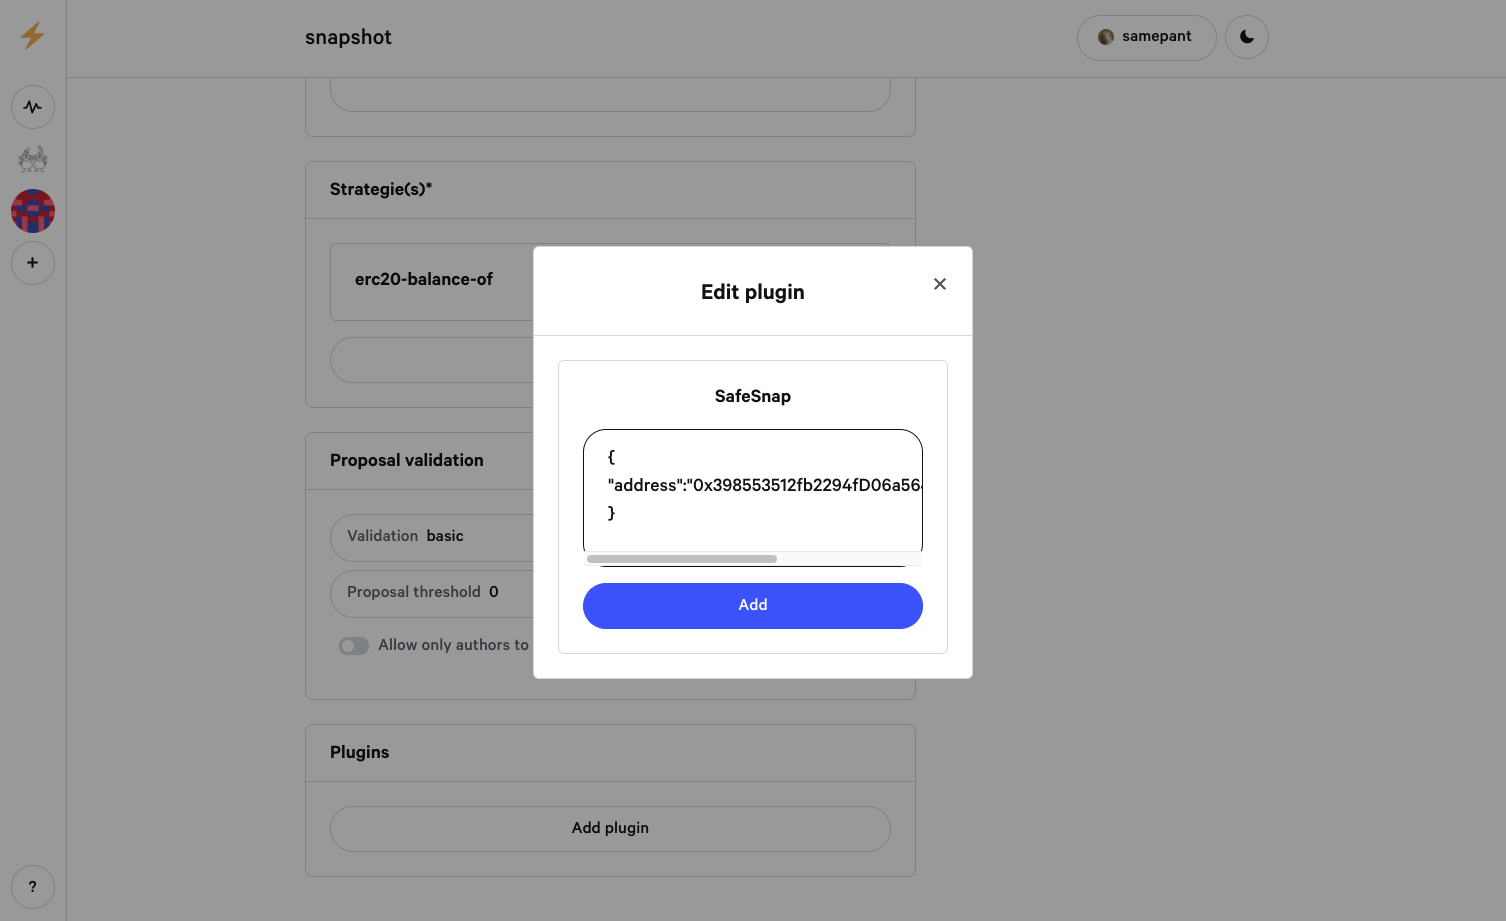
Click on the SafeSnap plugin:
Enter the following JSON, with your Reality Module address substituted.
{
"address": "0xSWITCH_WITH_REALITY_MODULE_ADDRESS"
}
It should look similar to this:
Using the SafeSnap plugin
Add transactions to a proposal
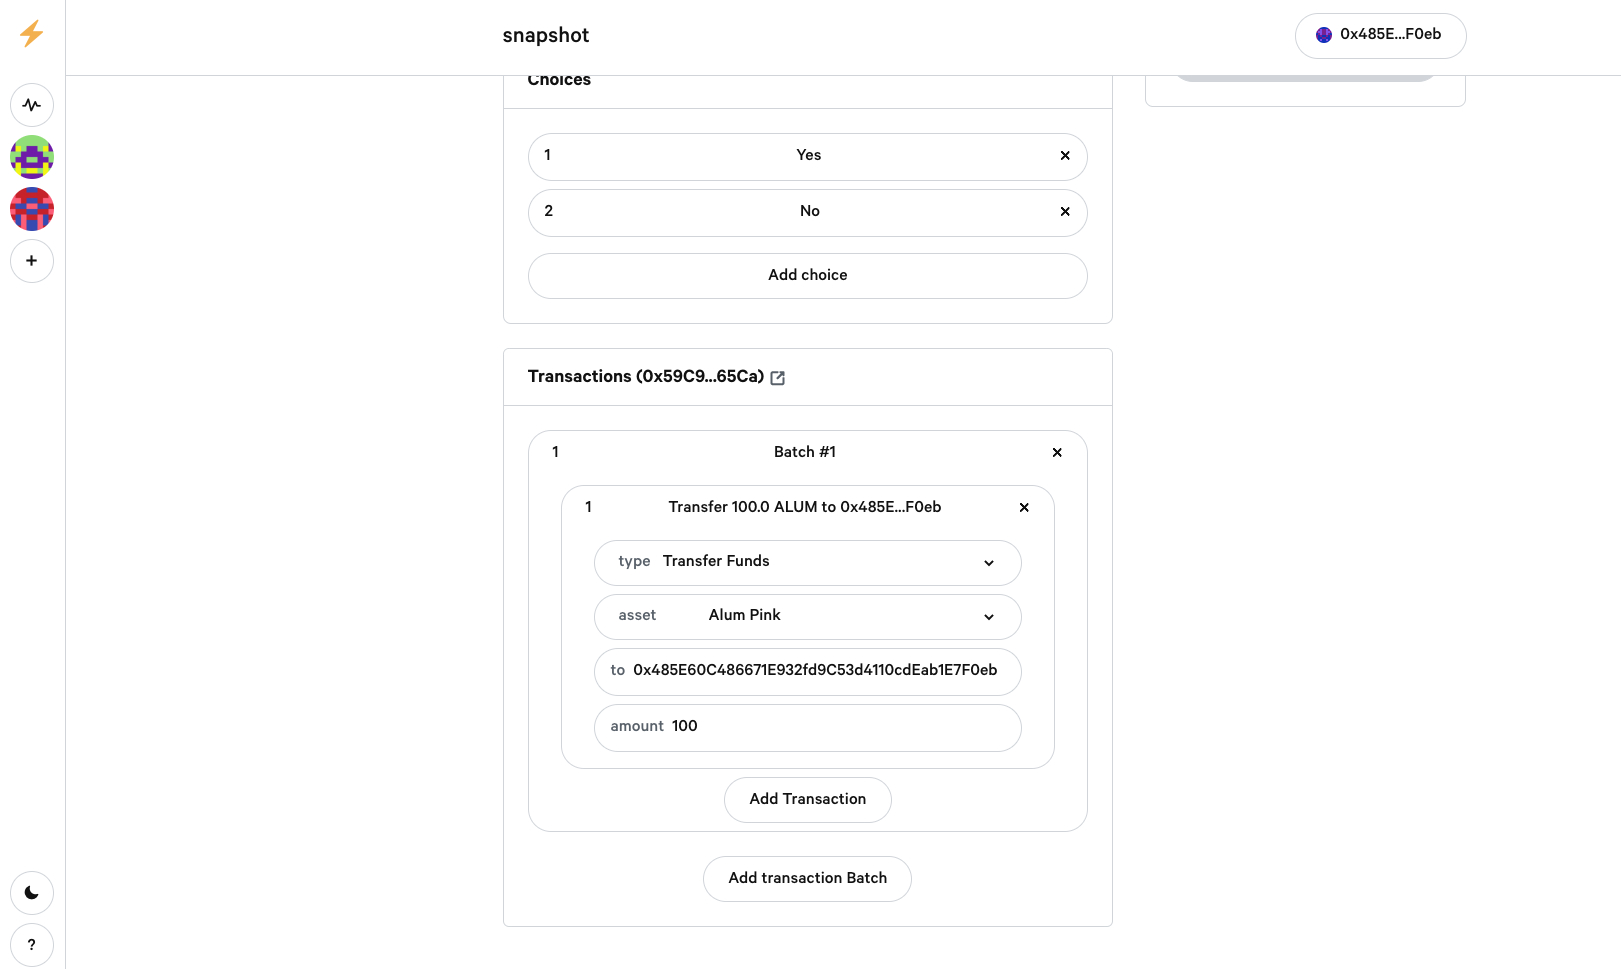
If configured correctly, a "Transactions" container will show below the "Choices" container when creating a new proposal.
Kicking off the Reality Oracle
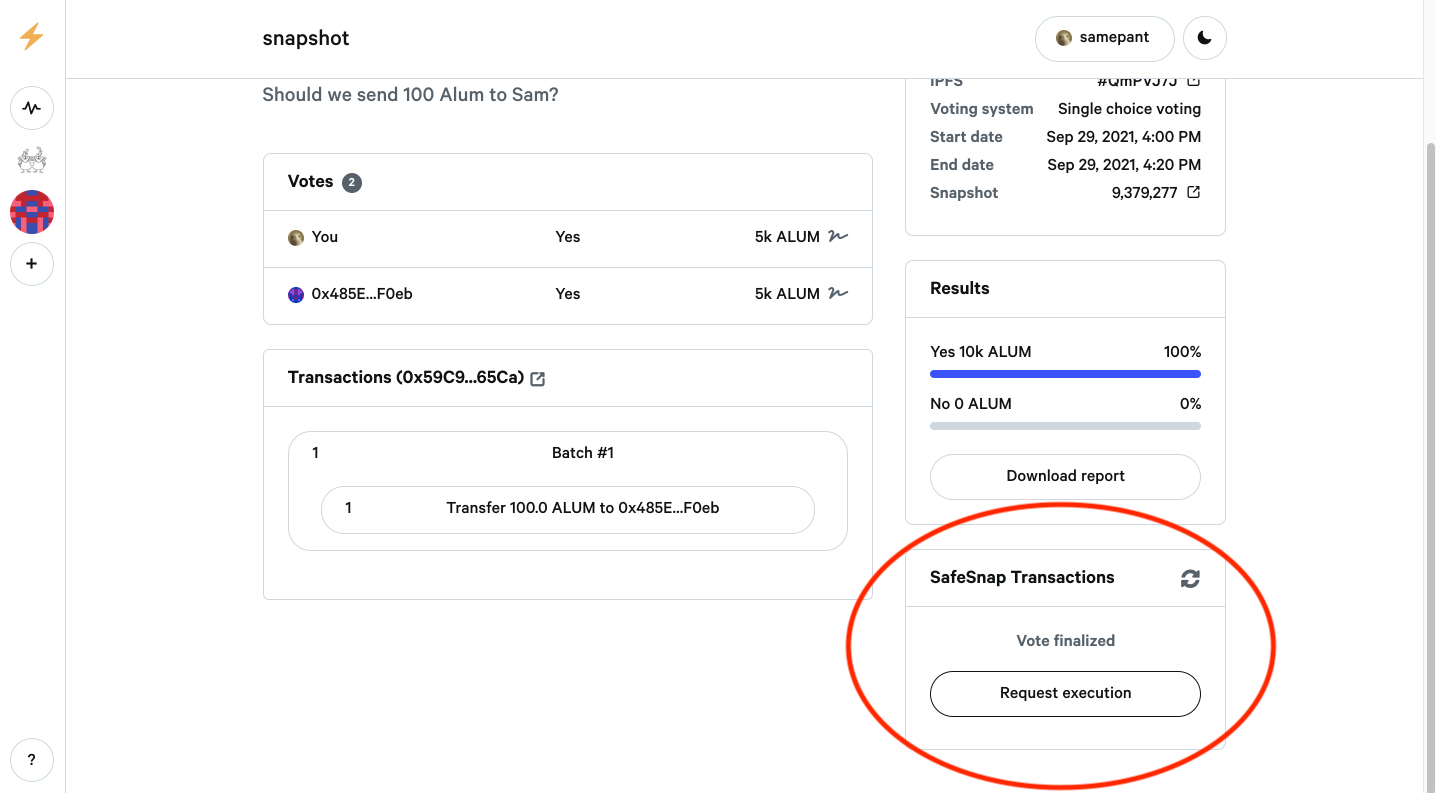
Once a vote closes on SnapShot, you will be able to "Request Execution" in the "Safesnap Transactions" window.
Setting an outcome
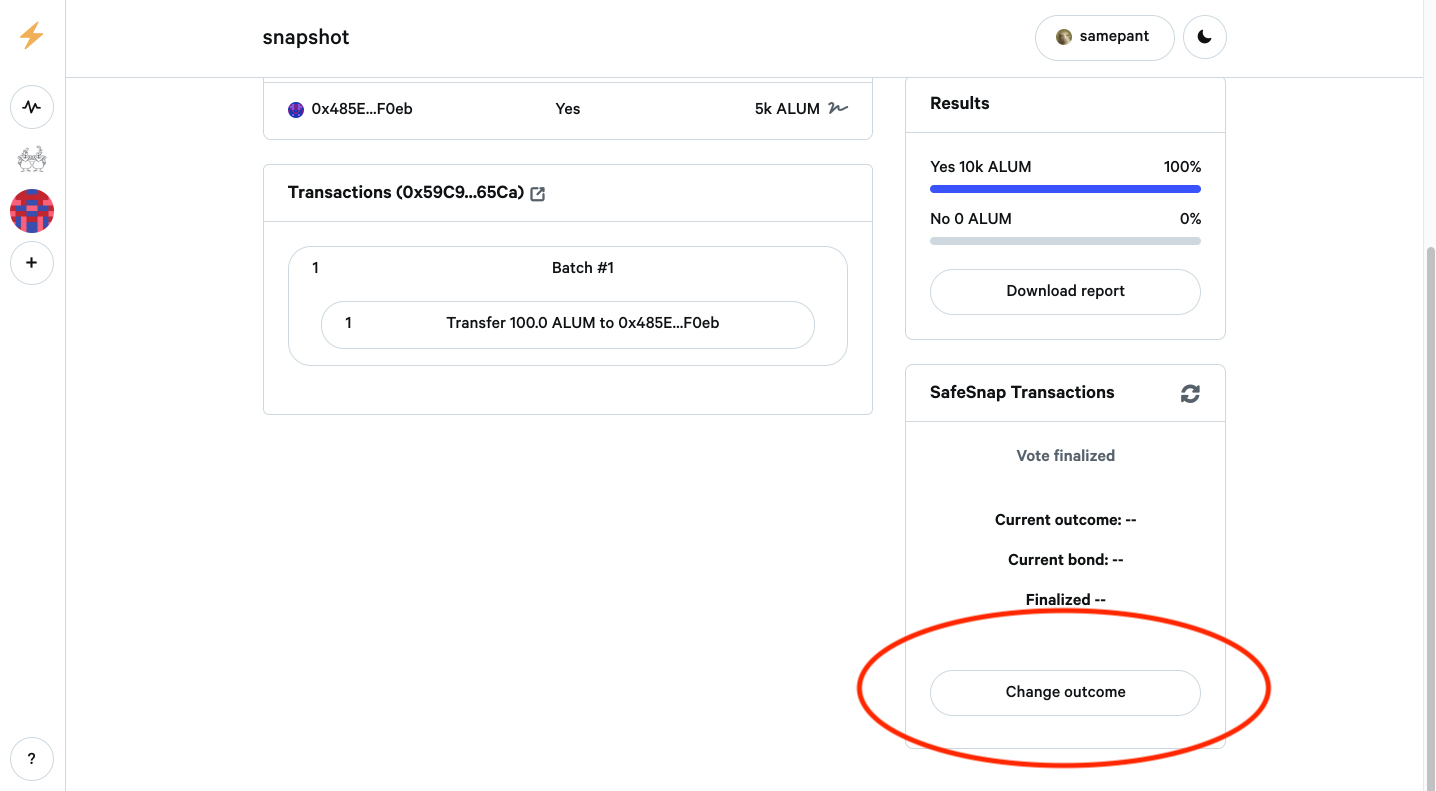
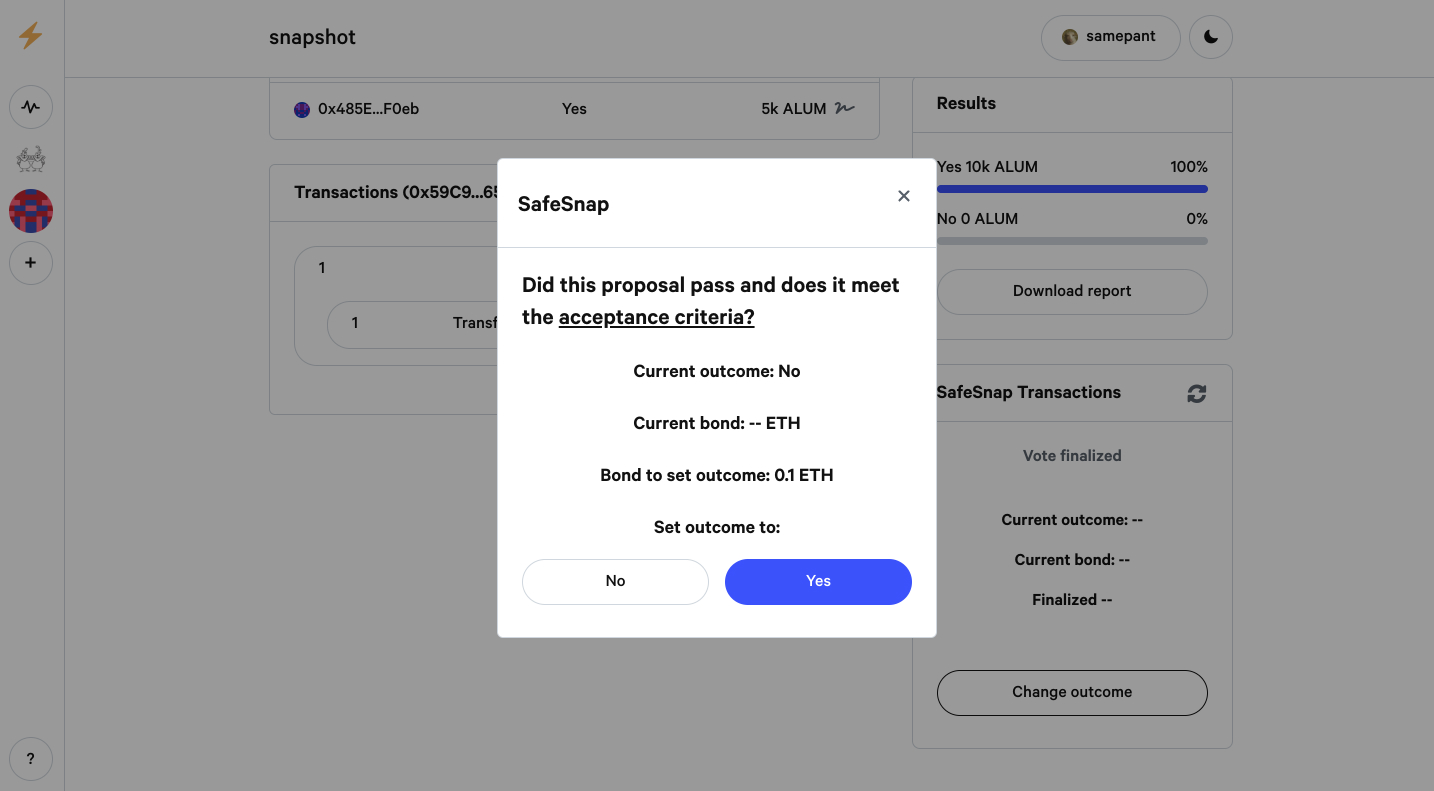
Once the Oracle has been initialized, an initial outcome must be set. The person setting this outcome must offer a Bond that can be claimed by them later if their answer is selected (this Bond value is set in an earlier step).
Waiting for an outcome to finalize
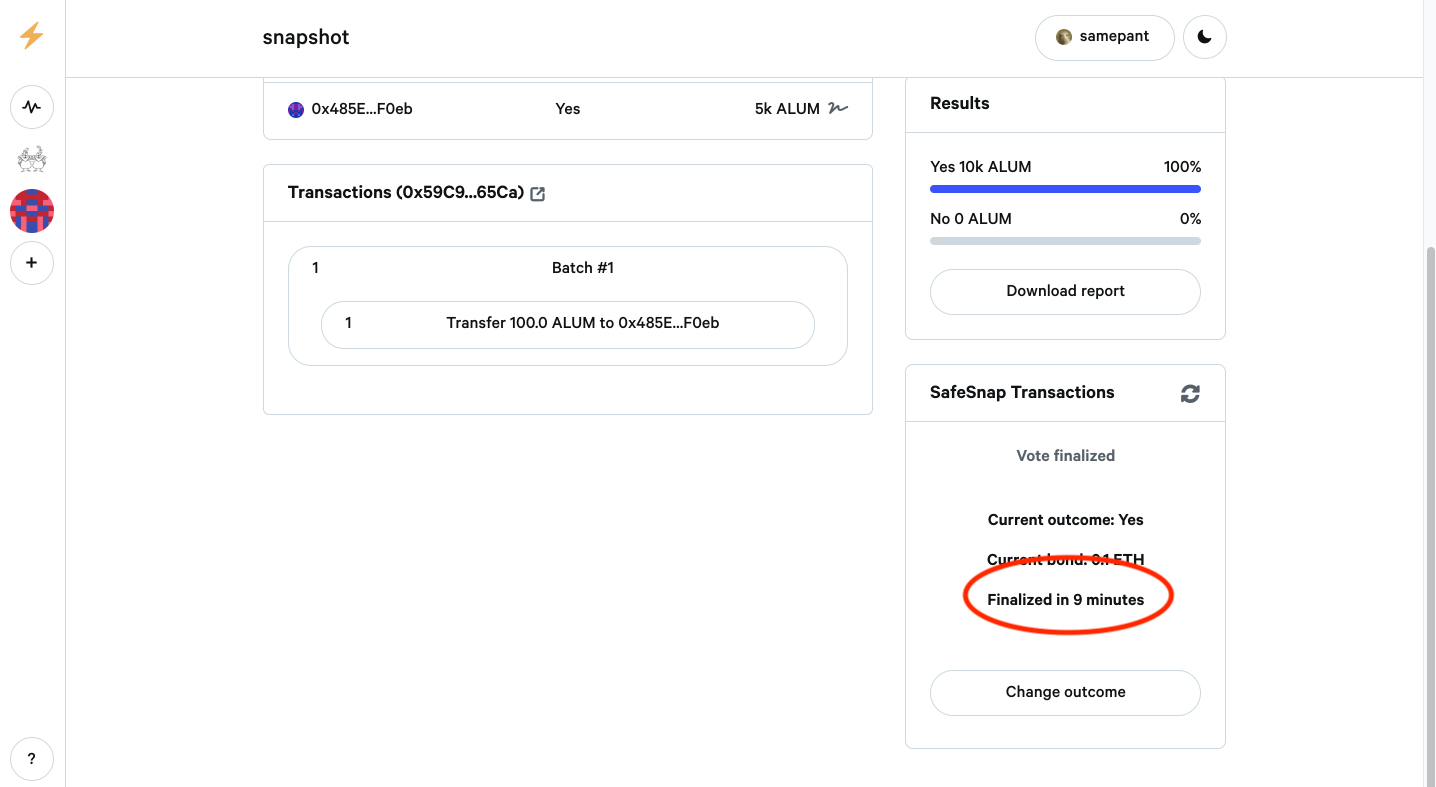
Once an outcome has been set, the SafeSnap window will show how long until that vote is finalized (this is the Timeout value we set in an earlier step).
Outcome cooldown period
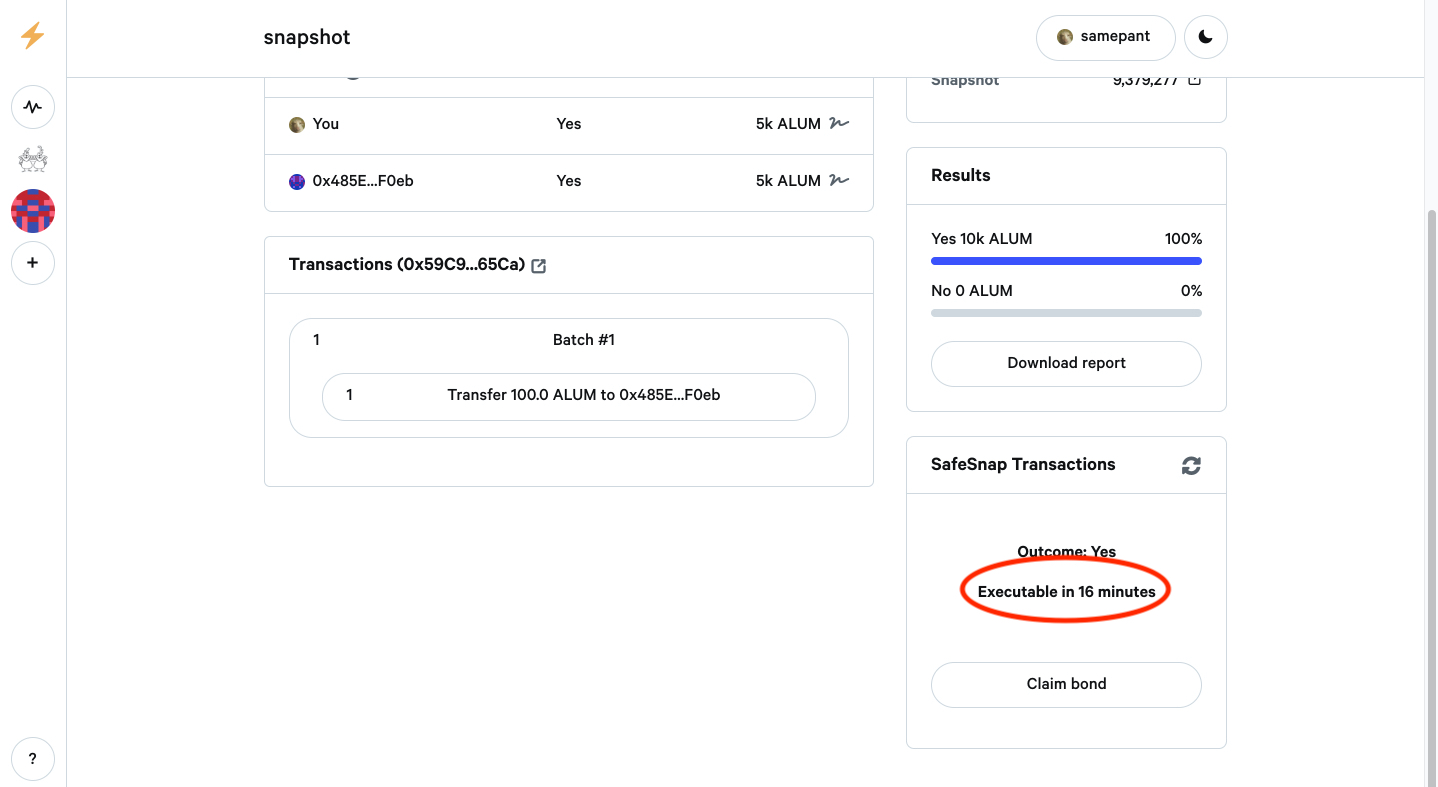
Once the outcome is finalized, the SafeSnap plugin will enter its <codeCooldown period, the waiting period after an outcome is finalized and before the transaction can be executed (this is the Cooldown duration we set in an earlier step).
Executing the transactions
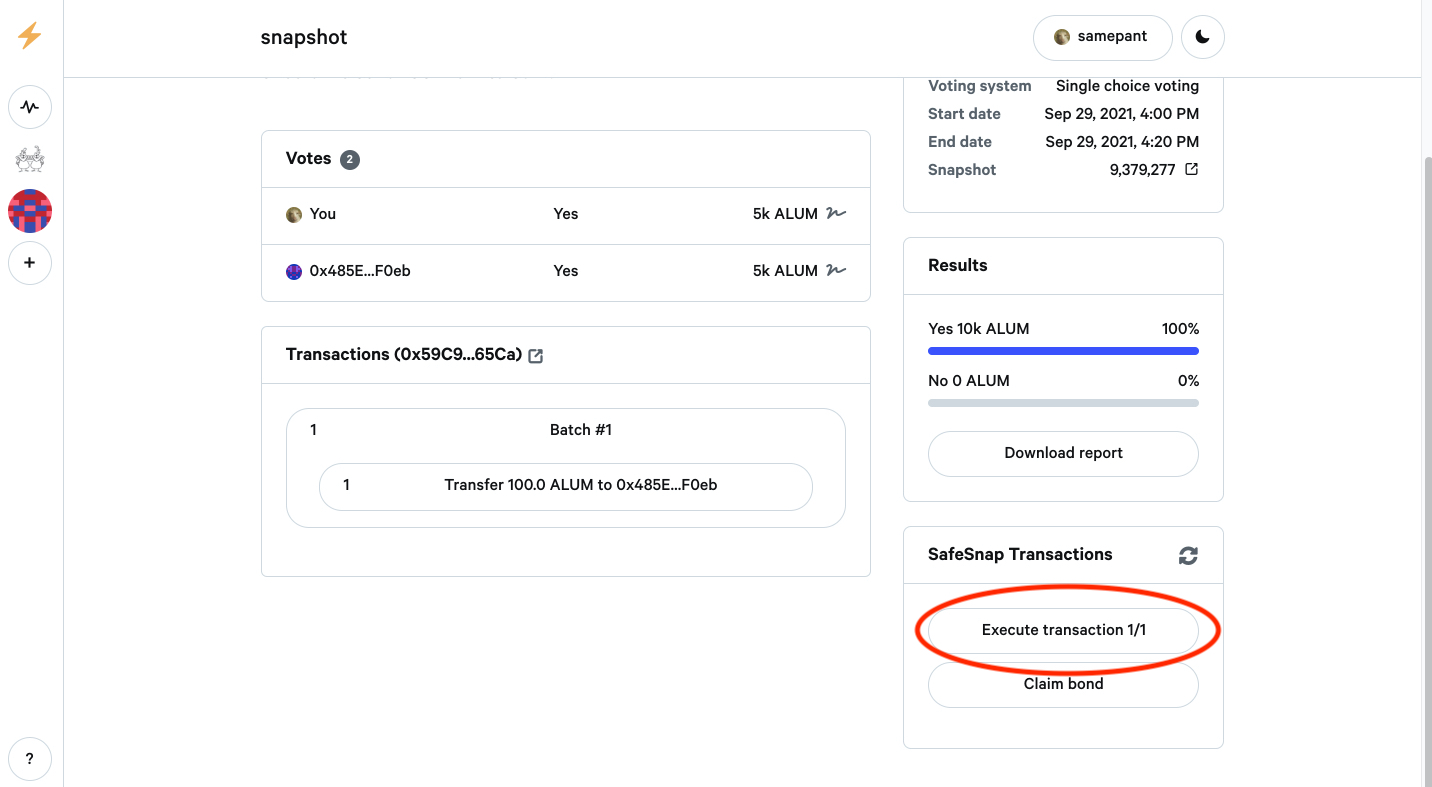
After the cooldown period, the transaction will be executable, and the bond put up to finalize the outcome can be claimed.
Monitor module
Because anyone can submit proposals to your Reality Module, it is strongly recommended to put in place monitoring practices. The Reality Module relies on the oracle (i.e. Reality.eth) to provide the correct answer, so that no malicious transactions are executed. In the worst case, the avatar can invalidate a submitted proposal.
To ensure all involved stakeholders can react in a timely manner, the events emitted by the module contract should be monitored. Each time a new proposal is submitted, the contract will emit a ProposalQuestionCreated event with the following parameters:
event ProposalQuestionCreated(
bytes32 indexed questionId, // e.g. Reality.eth question id
string indexed proposalId // e.g. Snapshot proposal id
);
There are different services available for monitoring, such as the OpenZepplin Defender Sentinel.
Questions?
If you need support or have questions about Zodiac, join the Gnosis Guild Discord.


